first off take note that if you have a 2008 or newer throttle body this will be slightly different for you because they changed the 08 throttle bodies alittle bit. the routing of the smaller tubes will be different that's it.
also the only thing i needed to buy for this install was 2 small hose clamps.
so here we go.
i'm not sure if you need to take all the front plastics off but it will make this much much easier so i would highly recommend it. you should also remove the fuel tank for easier access to everything around the throttle body.
first you have to remove the stock airbox, and intake tube.
then remove the air temp probe, that is in the stock tube, by using a small flat screw driver to work it up out of stock tube.
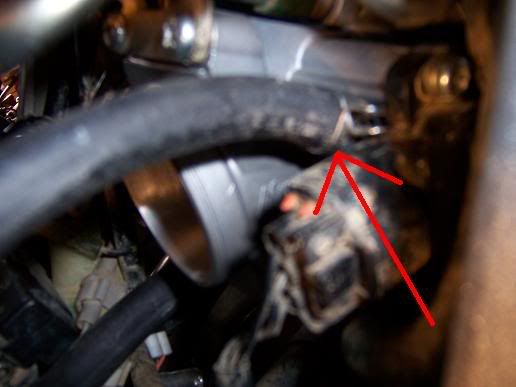
now you will need to remove the "T" shaped peice that the small air tubes from the throttle body were attached too, using the same method as the air temp probe.
now take the FCI intake tube and look over it very carefully. make sure it doesn't have any molding issues or other problems. see this thread i wrote up:
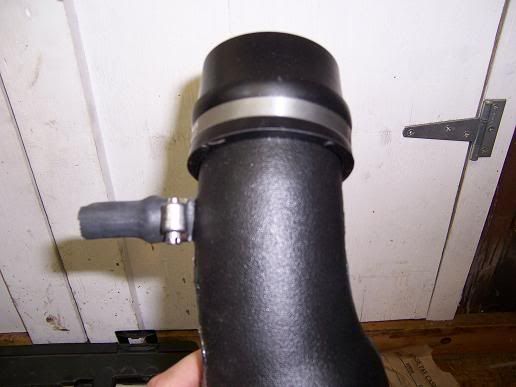
http://www.raptorsource.com/forum/index.php?topic=4263.0now take the FCI tube and put on the shortest peice of rubber tubing that comes with the kit on the little nipple sticking off the side of the FCI tube, then hose clamp it on there. also take the rubber mounting boot supplied with the kit and put that on the small end of the tub. like this:
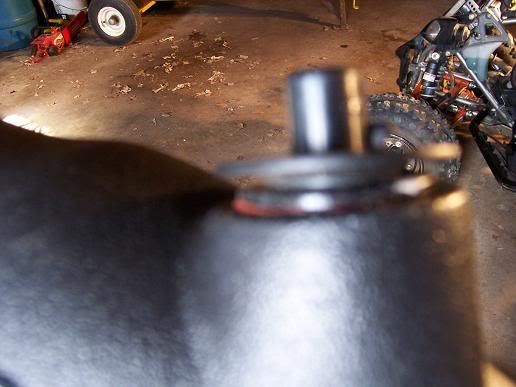
take the air temp probe and put a very small bead of silicone or like sealing product and then install it in the tube, in the proper location, i put a small O-ring on top of the probe and then put the "hold-down" plate on top of that. so it looks like this:
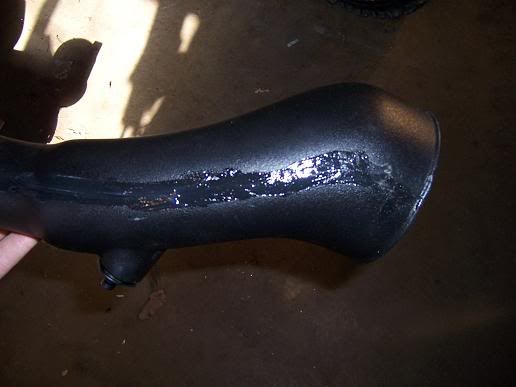
then i took silicone and layed a bead all the way down the seams on both sides of the FCI tube just for alittle added protection (see thread above for the reason why. lol) and set that off to the side to cure over night. you can skip this step if you would like it's not needed but i did it for obvious reasons. so this is what mine looked like after silicone:
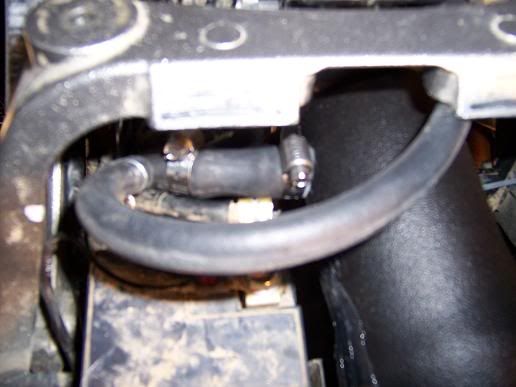
then i took the plastic "T" peice that i removed from the stock intake tube and put on the small peice of rubber tube supplied and the larger peice of rubber tube supplied. i had to cut the larger peice down by about half but i would test fit it to make sure before you cut the tube. here is what i ended up with after attaching the tubes to the "T":
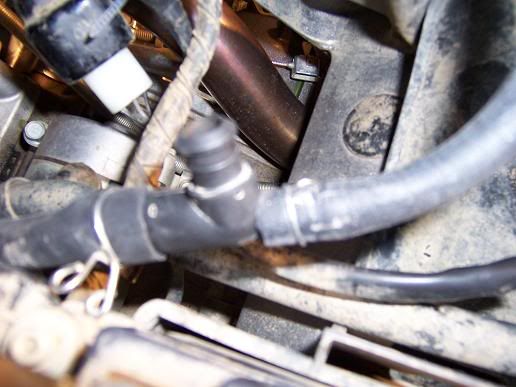
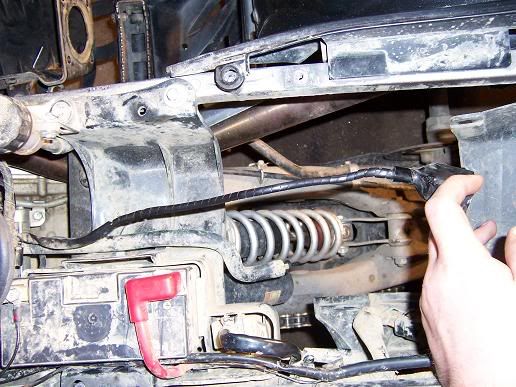
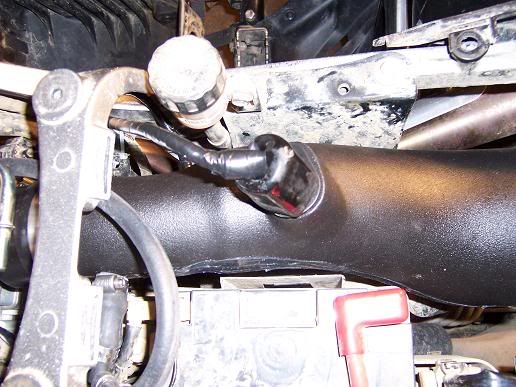
then i ran the small tube up and over to it's location, here:
and the larger one to it's location, here:

i went ahead and lengthened the air temp probe's wire by soldering in a 6" section of wire. i would highly recommend skipping this step if you don't have the equipment or skill to solder things properly. but this is what i ended up with:
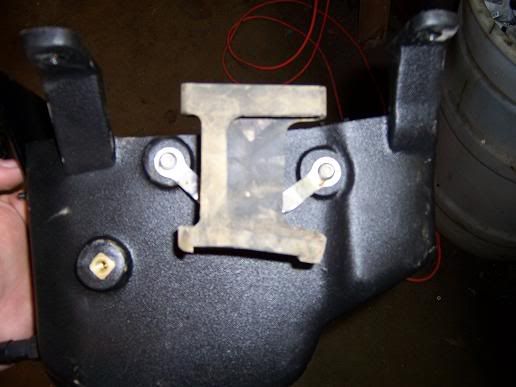
take the stock air box and remove the rubber mounting braket peice for the eletronics. and then mount it in the proper location on the FCI box like this:
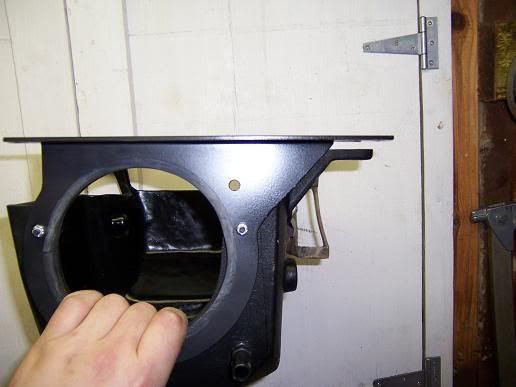
and you will need to line up and drill the mounting holes for the supplied aluminum mounting bracket. then easiest way to do this is, with nothing installed yet, put the intake tube through the aluminum bracket and put it up to the box then put the air filter on inside the box how it should go. mark and drill the holes to the proper size of supplied bolts. then mount the bracket to the box with the bolts. i went ahead and did some shaping on my bracket to make the wires fit between it and the frame better. this is what mine looks like:
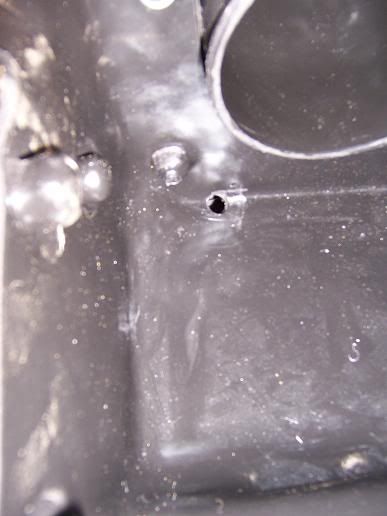
then i drilled a 3/8" hole in the bottom of the box to drain any water out that may get in there like this:
ok now it's time to start installing the intake. (finally lol)
take the intake tube and slide the small peice of tube onto the "T" and clamp it with the other hose clamp. like this:
this is also a good time to mount the tube to the throttle body with supplied hose clamp.
and plug in the air temp probe wire. it will still reach even if you didn't lengthen it, but you may need to reroute some wires. here's the pic of mine:
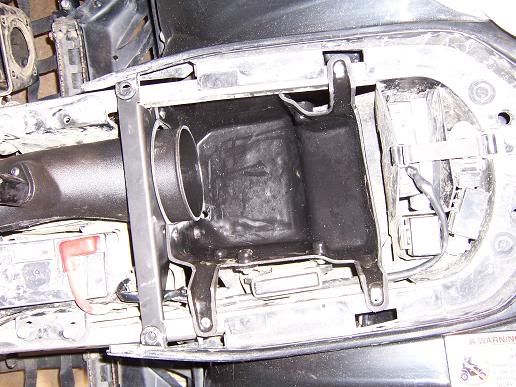
now for the fun part of getting the box into the frame. i suggest putting the eletronics into their holder before putting the box in the frame. you will need to do some wiggling to get it to go down but it will fall into place. it's seriously alittle difficult. here's how it should look when it drops down:
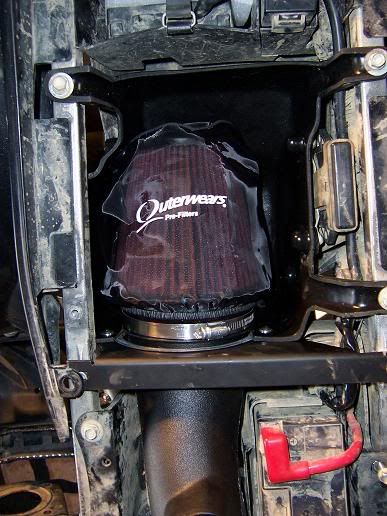
put the air box mounting bolts in you will only use 3 of the stock bolts for this. (note the aluminum bracket mounting holes will be put underneath where the front and back plastics meet and bolt to the frame. then it will get bolted down with the bolts used to hold down that section of the plastics.) and put on the filter with outerware. like this:
now you can start putting things back together.
slide on the crank case breather tube to the spot provided in the airbox, and bolt up the lower rear plastic. using stock hardware and holes provided in the airbox.
you will need to trim the rubber battery splash guard if you choose to use it still, if not then just get rid of it. i basically just trimmed mine down to cover the battery and that's it. pretty much cut it in half.
i also put a piece of foam inbetween the battey "hold-down" strap and the FCI intake tube because they were touching on my install. i didn't want the steel strap rubbing a hole through the plastic intake tube.
now put everything else back together and you are done.
if you have any questions about this install or write up please fell free to ask.


